Sometimes you want to do quick tonal correction without playing with curves or levels. The top photo is quite dark and it would be hard to find white areas for the color sampler tool.
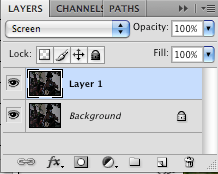
Press command J to make a duplicate copy of the layer.
I chose the screen blending mode since I wanted to lighten the image. You can fine tune it with opacity but this image is so dark I kept it at 100%
FYI:
Screen ignores black and makes things lighter.
Multiply ignores white and makes things darker
Overlay ignores grey and increases contrast by making things lighter and darker.


I think the bottom photo looks a lot better with very little effort. If I wanted to change part of the image I could play with gradients and masks but now it can be emailed or printed with decent results.

No comments:
Post a Comment