Thursday, December 31, 2009
How To Make A Color Cast Shadow In Photoshop Tutorial
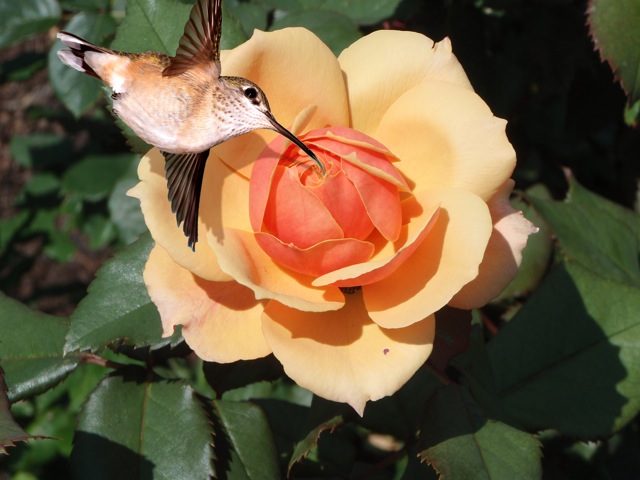
I'm starting with the same rose I used in previous tutorials and have added a hummingbird element. The hummingbird was masked and the background was discarded.
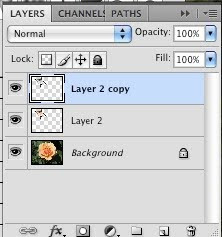
Duplicate the item that will cast the shadow by pressing command J on the layer that has the image. You want 2 copies.
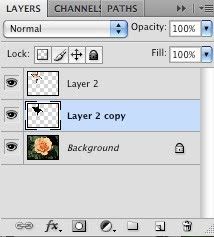
Move layer copy 2 under layer 2 by dragging the layer.
Ensure copy 2 is active by clicking on the layer. Go to images->adjustments->desaturate. You will now have a grey-scale image.
Images->adjustments->hue/saturation. Move the lightness slider to black and the image will become a black silhouette.
Shift the shadow layer so that it is slightly askew from the original image. Don't worry about the position being perfect.
Change the opacity of the shadow. I did this one 50%. You notice it's still black, only transparent. Shadows contain color so having color in your shadow will make it more realistic.
Choose a color with the eyedropper. I used a darker brown on the hummingbird.
Press shift delete for fill. Check preserve transparency and change the blending mode to multiply.
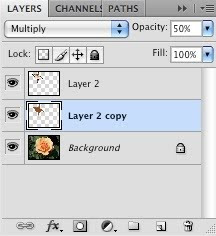
You'll see the shadow has a brownish cast.
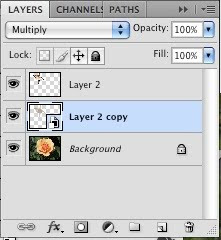
You'll want to convert layer 2 to a smart object so that it's easier to make changes later if you choose to.
Layer->smart object->convert to smart object.
Note how the layer 2 image has changed.
Press command T to bring up the bounding box. Shadows are not perfect replicas of the original so you are going to want to skew it.
Command click and drag to move the bounding box to make the shadow the shape you want. Click the check mark on top to accept the changes. Command T will bring back the bounding box if you want to make changes thanks to "smart object".
I added a slight Gaussian blur to soften the edges of the shadow.
Ta Da!
How To Do Fast Tonal Corrections With Blending Modes in Photoshop Tutorial
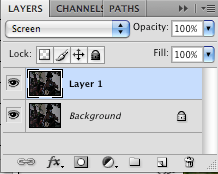
Sometimes you want to do quick tonal correction without playing with curves or levels. The top photo is quite dark and it would be hard to find white areas for the color sampler tool.
Press command J to make a duplicate copy of the layer.
I chose the screen blending mode since I wanted to lighten the image. You can fine tune it with opacity but this image is so dark I kept it at 100%
FYI:
Screen ignores black and makes things lighter.
Multiply ignores white and makes things darker
Overlay ignores grey and increases contrast by making things lighter and darker.
I think the bottom photo looks a lot better with very little effort. If I wanted to change part of the image I could play with gradients and masks but now it can be emailed or printed with decent results.
How To Cycle Quickly Between Blend Modes in Photoshop
I have a hard time remembering what each of the blend mode effects look like so I used to keep going up to the blend mode drop down box to press buttons until I found the desired effect. There's a nice shortcut.
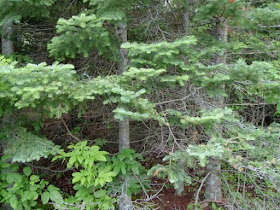
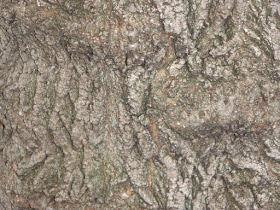
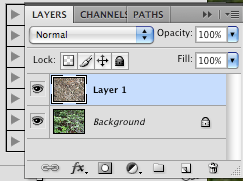
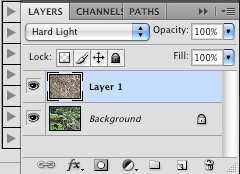
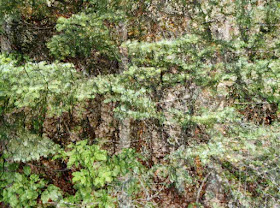
I'm starting with a photo of some evergreens in the woods and a photo of tree bark which you can see in the layers palette.
Press the v key to ensure the move tool is active.
Hold shift + to move forward or shift - to move backward
Voila! The woods are blended with tree bark using hard light. This is at 100% opacity but you can press the little down facing arrow (this brings up a slider) and the opacity slider can be easily adjusted for additional variation.
The same shortcut applies to the blending mode for paint brushes but you press b instead of v.
A quick way to change the opacity is press numbers on the keyboard. 5 would be 50%, 1 would be 10%, etc.
Wednesday, December 30, 2009
EDM # 253 Draw Your Socks
Friendship Is A Shelter From Life's Rainy Days
I must be in a poster mood. I think it may have something to do with the stack of frames I discovered under my desk that don't have corresponding mats.
Marilyn refuses to go out in the rain unless she's protected. I liked the impact of the dog silhouette with the umbrella silhouette over her head. You may not be able to see this on a low resolution web image but there is falling rain everywhere except under the umbrella.
The friendship with pets is so special that I wanted to make an image to celebrate that relationship.
Tuesday, December 29, 2009
I Finished This In Time For The Cold
Sunday, December 27, 2009
3 Artist Journals In One Year
Saturday, December 26, 2009
Helvetica Snowflake Alphabet Poster
Sunday, December 20, 2009
Art Cures Worries
I was feeling a little overwhelmed so I traced my hand and filled it in with a handful of worries. I surrounded the hand with lemons (if you have lemons make lemonade).
I was feeling better so I did a second drawing in my journal of a painting with a band-aid on it since art has mystical healing properties. I had visions of my minor meltdown showing up on Google images so I Photoshopped out the details; think of it as emotional retouching.
Friday, December 18, 2009
Inn A Pinch Cliche Poster
Thursday, December 17, 2009
Paper Cup Telephone
Poster Half Full / Poster Half Empty Reversable Poster
I thought I would do a series of posters about cliches and I started with glass half full/glass half empty.
The water side of the poster is half full and has the molecular formula for water, H2O.
The reverse poster is half empty of beer. The molecular formula is alcohol since beer is too complex and varied to have a definitive formula.
The reverse of the waves of the water form the suds on the beer. A friend asked me to put this poster in his shop so I'll be having some printed to sell.
Wednesday, December 16, 2009
Fake LP Record Sleeve
I got the idea of making a mock album cover from Paul Overton at Dude Craft. He has an excellent tutorial for making rocking Mini LP Record Gift Tags.
The recipient (my sister in-law) likes music from the 50s, pink and blue, Impressionist art and this was the only time she was brave enough to enter the ocean.
Tuesday, December 15, 2009
Sunday, December 13, 2009
Friday, December 11, 2009
How To Add Gradient Color To Brush Shapes In Photoshop CS4
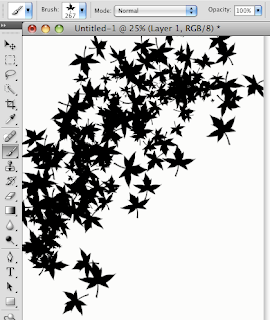
Photoshop has a nice variety of brush shapes you can use or you can download free brushes on the internet or make your own. For this example I'm using the leaf that comes with the program.
You can adjust the size of the brush as well as the frequency of the shapes. I prefer to use the brushes on their own layer so I use the keyboard shortcut for a new layer, command j.
Paint your shapes on the new layer by clicking (hold the button down) and dragging your mouse. If you don't like it, press command z to go back one step or go to edit->step backward.
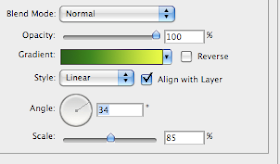
Go to layer->layer style->gradient overlay. Click on the gradient bar under layer style to bring up the gradient editor. Choose the style of gradient you want-solid, solid fading to transparent, etc. If you don't like the color choices on the existing presets, make your own. Double click on the little boxes that resemble paint buckets under the color bar.
You'll get access to the color picker and you can choose any color scheme you like.
If you need more color choices double click under the color bar and new paint buckets appear. You can slide the buckets if you want more of one color to get the color range you need for your effect.
You can also adjust the opacity, style, angle and the scale. Don't be afraid to move the settings to see how they effect the image. When you are happy with the look press OK. If you are very happy with your color choices, save them as a gradient preset so you can use them in the future.
Tuesday, December 1, 2009
How To Straighten and Crop A Photo In Photoshop CS4
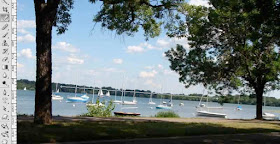
OK, I made this photo crooked to show how to fix it but it does happen to lesser degrees in real life. I like working from a duplicate in case I ever want to access the original file. To make a duplicate go to image > duplicate.
You access the ruler tool which is found under the eyedropper. Normally I would line up the horizon with the water but it was difficult to see in the tutorial image, so I used the trees. Pick a spot that you can make a straight line from. Click, drag and release to complete the line.
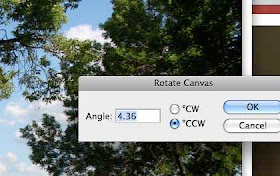
Go to image > image rotation > arbitrary. This will bring up the rotate canvas box. Click OK
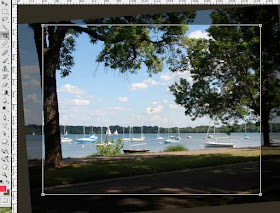
Your photo is now straight but it needs cropping. You can crop to size by entering numbers in the tool bar or do it visually. Click the crop tool and drag out a rectangle. You can adjust the crop by clicking the mouse and moving the future cropped area (do not release the mouse button until you are happy with the position)
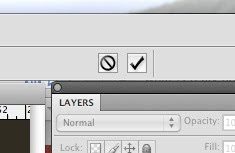
Then click the check mark to approve the changes. If you don't like the change, click the circle with a diagonal line through it.
Save your now straight photo.