Every morning I long to hold you. I need you, I want you, I have to have you. Your warmth, your aroma, your taste...oh coffee, I love you!
This poster is made to resemble a vintage screen print; the colors were taken from a 1940's photo of the glamorous Dorthy Lamour. The background has a field of coffee cups ready to fill or be washed.
Tuesday, October 28, 2014
Friday, April 4, 2014
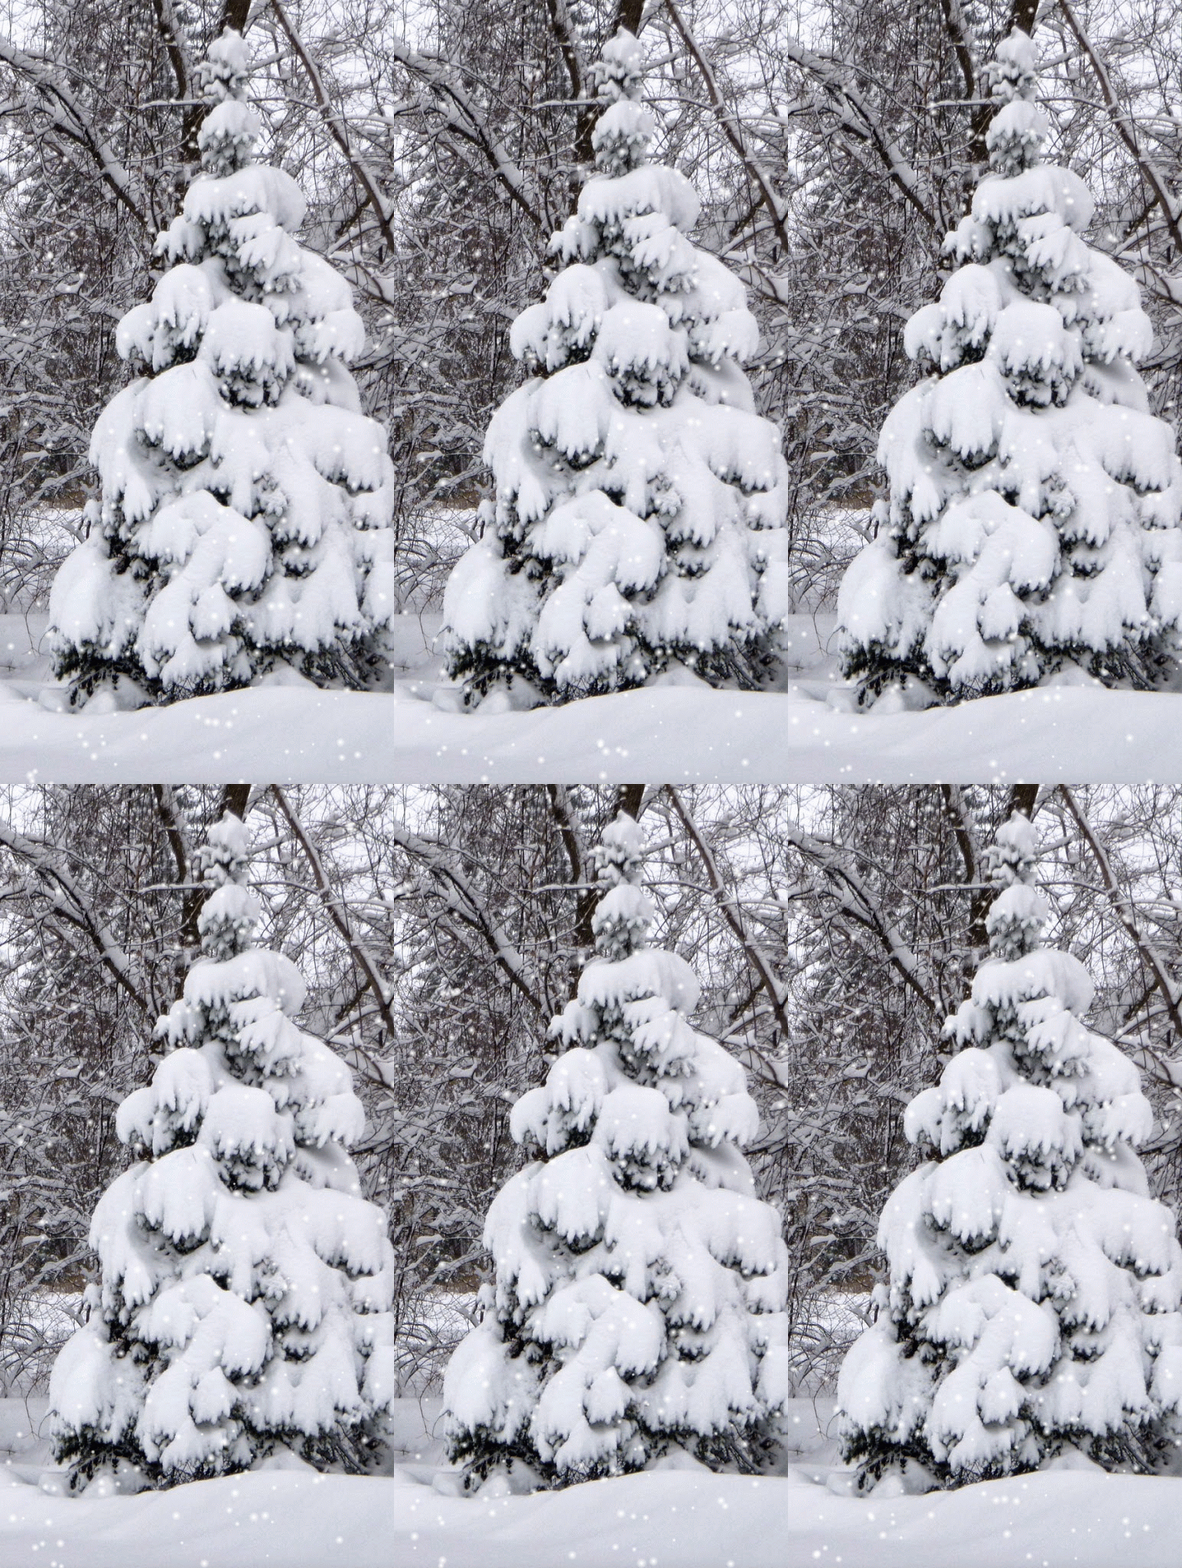
Minnesota Spring Blizzard
Yesterday Robins were splashing in the pond, today I had to use 4 wheel drive to get up the driveway. Five days from now the forecast high is 70 degrees. A Minnesota spring is never boring.
Labels:
photograph,
snow
Tuesday, February 4, 2014
How To Carve A Rubber Stamp Using Speedball Speedy-Cut
I bought some sheets of Speedball Speedy-Cut at Blick. It's perfect for printing with water soluable mediums and carves like butter.
I did a sketch on tracing paper of my daughter wearing a goofy dog hat I made for her earlier this winter. I placed the pencil drawing, graphite side down, on the rubber surface. I rubbed the back of the drawing with a bone folder (a spoon would work) to transfer the lines. You don't want to draw directly on the surface since you could dent it and might not want the lines to show on your print.
The transferred print. It would have been helpful to stain the rubber with an ink pad so I could have seen the carved lines easier. Excess material can be cut off with a razor blade or X-Acto knife.
The carving was done with linoleum block carving tools. I used a fine gouge, a medium V and a wide gouge for removing larger sections. I carved until I thought it was almost done, inked the stamp, and made a print. This let me know where I needed to carve more. I didn't want to clean up all the lines since I like the rougher, wood block print look.
I had better results laying the stamp flat and pressing the ink pad down onto it rather than pressing the rubber block onto the ink pad. Speedy-Cut is 3/8 of an inch thick and is sturdy enough to not need a wood back. Remember, if you add text, the image has to be backwards or it will print backwards.
Don't undercut the raised areas since it will damage the integrity of the printing surface.
Labels:
craft,
how to,
printing,
rubber stamp,
tutorial
Tuesday, December 17, 2013
Lomo Style Effect in Photoshop Applied To Photos Of Iris Flowers
My husband set up a new home office and he needed a little artwork above his computer; he has a wonderful view of the wall. My first thought were some vacation photos but that seemed a little cruel when you need to shovel a path so the dogs can go outside.
His favorite flower are irises so I thought I'd bring a little spring into the room. The images were nice but uninspired. I used a techinique for faking Lomo photography in Photoshop and the flowers are significantly lusher
Labels:
photoshop
Tuesday, October 15, 2013
Monday, October 14, 2013
Get Kraken Octopus Zentangle With Paper Boat Greeting Card
I saw a wonderful old vintage image of the Kraken attacking a ship and thought it would be funny if it were a paper boat. I'm not certain where the Zentangle came from; some days my sketch book is an odd place to be.
Available on Etsy.
Available on Etsy.
Labels:
illustration,
illustrator,
ink drawing,
zentangle
Saturday, October 12, 2013
Friday, October 11, 2013
Monster Peering Through Window Blinds Halloween Greeting Card
Is the creepy monster peering out or in? What a nice way to let someone know you are thinking of them.
Available on Etsy
Available on Etsy
Labels:
illustrator
Thursday, October 10, 2013
Monster Under The Bed Halloween Greeting Card
I used to have many elaborate rules about the monster under the bed. You were safe as long as nothing dangled over the edge since fingers were especially tasty and blankets could ward off any attack. OK, I still don't have dangling bits but I know better now...
Available on Etsy.
Available on Etsy.
Labels:
illustrator
Wednesday, October 9, 2013
Happy Halloween Greeting Cards Made From Original Paintings
I was cleaning up the studio last night and rediscovered two Halloween paintings so I took the image and made them into greeting cards which are available on Etsy.
I opened a new shop awhile back where people can download digital copies so they can print them for their own use.
Labels:
acyclic painting,
illustrator
Saturday, September 28, 2013
October Calendar To Do List List Illustration
This month's illustration has silhouettes of a mouse, grasshopper and dragonfly sneaking past a spooky gate while a startled moon looks on. The vintage image components came from the Graphics Fairy and then I layered them in Photoshop.
Friday, September 27, 2013
Thursday, September 26, 2013
Stargate Inspired Paper Pyramid With Glyphs For Earth, Pisces, Aquarius and Gemini
I made a paper pyramid and had been stumped by what to put on it and this morning it struck me, Stargate symbols.
I used the Stargate symbols that correspond to our zodiac and Earth. Despite what my kids occasionally think, Earth is my home planet. You're welcome to click on the template to make the image larger.
I used the Stargate symbols that correspond to our zodiac and Earth. Despite what my kids occasionally think, Earth is my home planet. You're welcome to click on the template to make the image larger.
Labels:
illustrator
Wednesday, September 11, 2013
Watercolor Painting of a Frog Holding An Umbrella From My Art Journal
I only did a journal sketch since I never do serious paintings from another person's images. I had mixed feelings after I completed it since I tried to find out more about the photographer to give him credit for the shot.
There's a bit of controversy over the series of photographs. I prefer to take the photo in good faith and hope nothing bad happened to the frog. Photographers luck into amazing shots and he did appear in National Geographic. Animals are clever and capable of using tools.
The lesson I learned is stick with my original images and not be swayed by pretty pictures. Life is simpler that way.
Labels:
artist journal,
ink drawing,
watercolor painting
Thursday, September 5, 2013
September Calendar To Do Page
The illustration shows my day in a mandala format.
The center is a goat cheese pizza. Many of the shapes are from a painted tote bag. The tote bag has a Star Trek insignia from Star Trek Into Darkness. The blue coffee cup is the cappuccino cup my daughter made me that I use daily.
The center is a goat cheese pizza. Many of the shapes are from a painted tote bag. The tote bag has a Star Trek insignia from Star Trek Into Darkness. The blue coffee cup is the cappuccino cup my daughter made me that I use daily.
Labels:
calendar,
illustrator
Tuesday, August 20, 2013
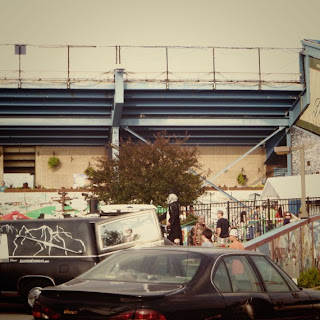
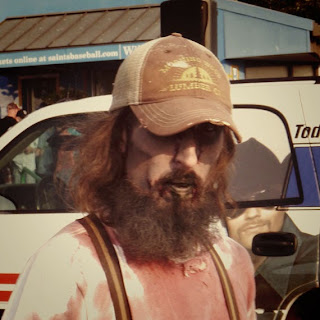
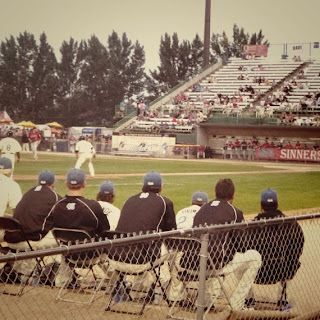
Zombie Night at the St Paul Saints Baseball Game - Small Adventures Week 6
Zombies and baseball, I love minor league baseball.
There was a zombie race and beauty pageant.
The Zombies must have scared away the crowds since the stadium was maybe 10% filled.
Labels:
photography,
small adventures
Drawing On Rocks with Ink - Small Adventures Week 5
We have a lot of rocks gathered from the shores of Lake Superior. My 2 daughters and I went to McDonalds last week, fortified ourselves with sausage biscuits and started drawing on the rocks with Sharpie markers.
Sharpies get a bit smelly so the picnic tables outside McDonalds was a pleasant place to work.
Labels:
ink drawing,
small adventures
Tuesday, August 13, 2013
Paracord Survival Bracelet - Small Adventures Week 4
I've been at the cabin a lot lately and this seemed like a fun craft idea. We watched a video, made a loom, and printed the directions. We were ready to shop.
I had to go to WalMart anyway so we checked their craft department. WalMart is known for supporting the military so I thought there was a good chance they would have the materials. They did, but only in camo shades.
We then went to JoAnn Fabrics and found kits in the jewelry making area. We bought the kits and came home. The green one came with a mirror reflector dog tag.
We opened the package and discovered that the cords were cut in half so the 8 foot directions no longer worked. The package directions were different and the bracelets were no longer made on a loom. OK.
They were fun to make but if you want the functionality of a true survival bracelet I would not recommend the kits. We sealed the ends with a lighter but they popped away from the bracelet when we opened and closed the bracelet. I wanted it stay down so we glued they ends down with Tacky glue. It's not up to military specs; but in the event of a zombie apocalypse, I can find North, we can signal for help and my other daughter's job will be to yell "Run faster!"
Labels:
craft,
small adventures
Tuesday, August 6, 2013
August Calendar Illustration of Corn Popping in the Field
The ironic part is this is actually probably the coolest August I've ever experienced. I should probably have put scarves and ear muffs on the corn cobs.
Labels:
calendar,
illustrator
Wednesday, July 31, 2013
Garden Stone Ideas from Caponi Art Park
The garden stonework at this fun park is inspiring and a lot it it is attainable. I think I'll incorporate some of the elements at the cabin.
The top edging is concrete blocks with stone obelisk behind them.
I would not have thought you could have had the paved paths in Minnesota with the frost pushing up the stones but they looked great. One is stone and the other is timbers placed on end.
The garden bench was built into a stone retaining wall.
Labels:
photography
Tuesday, July 30, 2013
Flamenco Dancing at Caponi Art Park - Small Adventures Week 3
Flamenco Para Todos with Flamenco Espana performed at Caponi Art Park in Eagan, MN.
There are 60 acres of art in a woodland setting to explore. Most of the sculptures were done by the park's founder, Anthony Caponi.
Many of the sculptures are incorporated into the landscape and the earthworks become part of the experience.
The Photoshop action for the film strip is Sutro.
There are 60 acres of art in a woodland setting to explore. Most of the sculptures were done by the park's founder, Anthony Caponi.
Many of the sculptures are incorporated into the landscape and the earthworks become part of the experience.
The Photoshop action for the film strip is Sutro.
Labels:
photography,
small adventures
Friday, July 26, 2013
The Tall Ships Came Into Duluth, Minnesota - Small Adventures Week 2
The tall ships docked in Duluth 7/25 and were well received by a huge crowd of onlookers. I don't think I've ever seen so many cameras in one place.
Afterwards, we joined another huge crowd at the Portland Malt Shop for the best malts in Minnesota.
We continued along old highway 61 which skirts the lake. We've taken this lovely drive many times but the rain that hit on the way back was new. It struck the windshield like hail and was painful when we stuck our hands out the car windows. Cool. I love a good storm.
This photoshop action is Brannan.
Labels:
photography,
small adventures
Sunday, July 21, 2013
Art Car Parade Around Lake Harriet - Small Adventures 1
Traffic around Lake Harriet took an odd turn last night when the Art Car Parade wound it's way around the lake.
The couch is controlled by a game style controller and it races and spins around the street.
My daughter's favorite was a Dr Who car with Bad Wolf written on the side.
Yesterday while on a bike ride with my daughter I decided we needed to schedule weekly small adventures where we do something different or learn a new skill.
My family spends too much time in different rooms with everyone on their own computer; we've even texted each other inside the house.
The Instagram style film strip actually was actually taken with a digital SLR camera but I do like playing with my toys. Daniel Box made some very nice Photoshop actions that are very easy to use. This one is Toaster. My plan is to do a photo strip for each of our small adventures.
Labels:
photography,
small adventures
Saturday, July 13, 2013
How To Make a Recycled Envelope Book with Scrapbook Paper Instead of Envelopes.
I remembered seeing an envelope book and thought I could use some more scrapbook paper to make something similar. I chose a tropical theme and will use it for my next vacation.
I grabbed a book from the stack that I'm donating to the library and carefully cut the book free from the cover with a razor blade. I'm keeping the pages since I plan to incorporate them into the finished book later.
I measured the spine to see how big to make the insert. This book is 1.25 inches wide.
Now for the math.
I want the insert to be a little smaller than the spine so that it can lay normally when the pages are filled and the "envelopes" are filled. My spine is 1.25" wide so a 1" wide insert will fit well.
I want a 1/2" flange so the larger piece of paper is 2" x 8.75 (the length of the page I want the finished book to have minus .25")
I want to have a .25" space between the flanges so the next 2 pieces of paper are 1.5" wide.
The fold lines are indicated with a dashed line. A scoring board is very helpful but not required.
The center flange is glued together inside. I used Tacky glue since that was what I had on hand and a glue stick would be strong enough.
All 3 folded flanges nest inside each other and are glued along the bottom.
I used scrapbook card stock to make the spine flange.
The book spine isn't stable enough to glue the spine flange to, so I cut a piece of cardboard to size and glued it in place.
I glued on new endpapers to cover the existing ones and cover the cardboard covered spine. I used white scrapbook paper and since the book is wider than 12" I have a seam in the center.
Make sure you fold the book closed to ensure you don't have the paper glued too tight.
I plan to decorate the endpapers with art so the white will suit my needs but a more interesting end paper would be fun.
Glue the center flange in place.
My finished envelope pages will be 5.5 x 9 inches. Scrapbook paper is only 12" so I needed to piece the envelope sleeve.
I cut the sleeve 5.5 x 9.5 and folded each piece .5 inch on opposite ends.
Glue the 2 pieces of paper together with the folds on opposite sides to reduce bulk at the seam.
Put glue on both sides of each individual flange and slide the envelope sleeve on. Press in place. Check the pages by turning them (like you were reading a book) since they need to have a little space for turning and you don't want the pages too tight.
The finished book. I'll be cutting watercolor paper to size so I can use to as a travel journal. The nice thing is the scrapbook pages are acid free so it won't hurt the artwork.
Labels:
bookmaking,
bookmaking tutorial,
tutorial
Thursday, July 11, 2013
How To Make A Book With Pockets From A Sheet Of 12" Scrapbook Paper
I have a bunch of scrapbook paper that I don't know what to do with. I thought a book might be good since the paper is acid free and nice quality. This is a cross between a couple of other books I've previously made and I think it turned out cute.
You don't need a Martha Stewart Crafts Scoring Board and Envelope Tool but it sure makes life good. You rest the paper against the guides and run a bone folder along the groove.
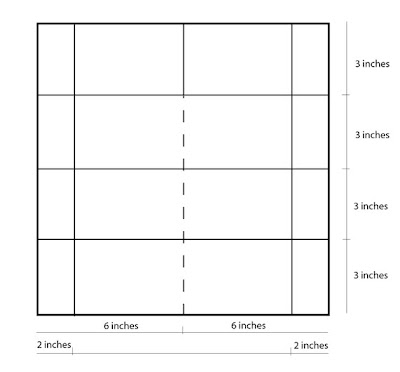
Score a piece of 12 inch scrapbook paper along the above lines. Fold along the scored lines.
Cut along the dashed line but do NOT cut the remaining 3 inches.
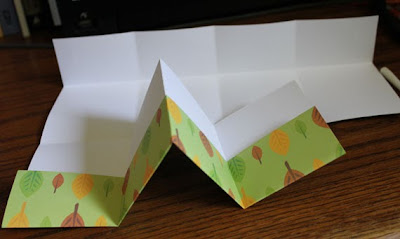
Fold the first side accordion style.
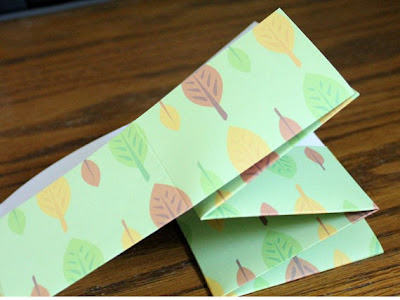
Now's the tricky part. When you get to the end of the first side, you fold the uncut edge backwards so that you can continue to fold the remainder of the book accordion style.
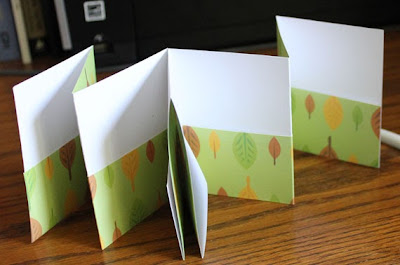
You can see the open space where the uncut side was folded.
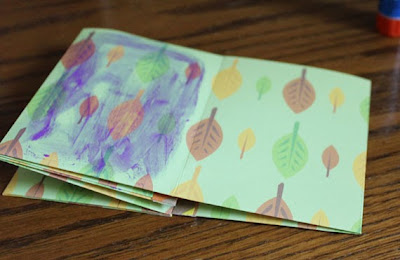
Glue the back side of the pages together. I just used a glue stick.
To prevent things falling out of the pockets, I taped the edge with decorative tape and trimmed the excess. Washi tape would be great but I used decorative tape that I found at Target.
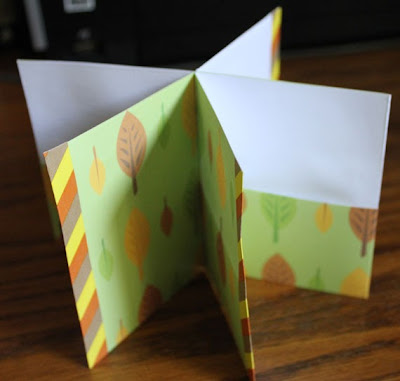
You can see the backs of the pages are glued and the 3 open folder edges have been taped.
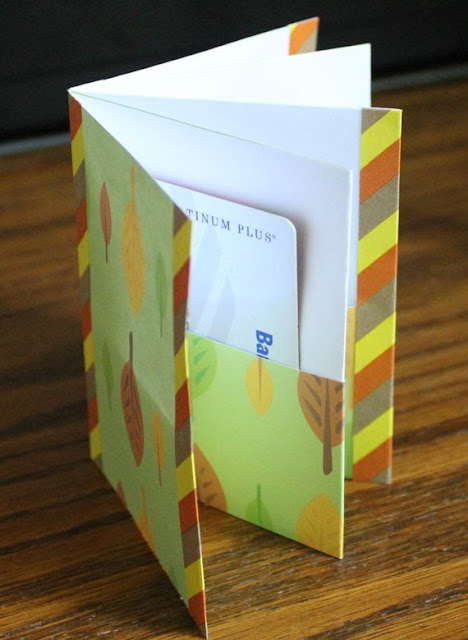
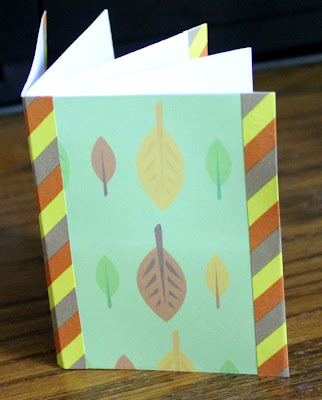
The cover of the finished book.
You can use the pockets for credit cards, business cards, or mementos. The paper is acid free so it would be nice to draw on the white portion and keep small items in the pocket. I think I might glue some of these inside the cover of my artist journals.
Labels:
bookmaking tutorial,
craft,
tutorial
Subscribe to:
Posts (Atom)


