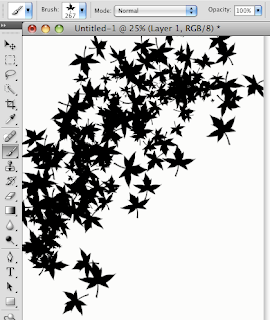
Photoshop has a nice variety of brush shapes you can use or you can download free brushes on the internet or make your own. For this example I'm using the leaf that comes with the program.
You can adjust the size of the brush as well as the frequency of the shapes. I prefer to use the brushes on their own layer so I use the keyboard shortcut for a new layer, command j.
Paint your shapes on the new layer by clicking (hold the button down) and dragging your mouse. If you don't like it, press command z to go back one step or go to edit->step backward.
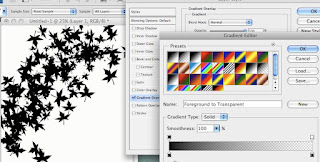
Go to layer->layer style->gradient overlay. Click on the gradient bar under layer style to bring up the gradient editor. Choose the style of gradient you want-solid, solid fading to transparent, etc. If you don't like the color choices on the existing presets, make your own. Double click on the little boxes that resemble paint buckets under the color bar.
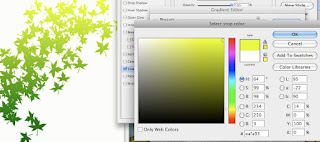
You'll get access to the color picker and you can choose any color scheme you like.
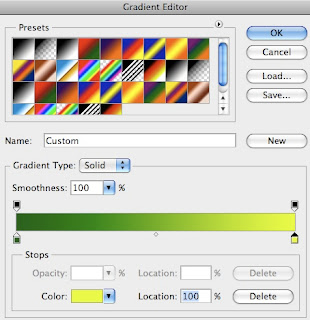
If you need more color choices double click under the color bar and new paint buckets appear. You can slide the buckets if you want more of one color to get the color range you need for your effect.
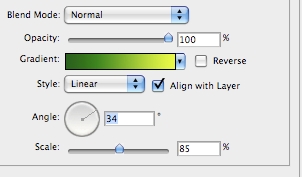
You can also adjust the opacity, style, angle and the scale. Don't be afraid to move the settings to see how they effect the image. When you are happy with the look press OK. If you are very happy with your color choices, save them as a gradient preset so you can use them in the future.

I would really like to figure out how to do this in Photoshop 7. I do all the steps as I understand them but all I see is the solid gradient over my leaves (which are not visible.)
ReplyDeleteAre you using the layer style gradient overlay? Sorry but it's difficult to answer the question without more information. Can you email me a screenshot? My email is on the upper left of the page under the airmail sticker.
ReplyDeleteI figured it out for PS7 - In the layer style palette you need to hit lighten or difference in the blend mode before you say ok. Then the leaves will have the gradient and if you hit difference the background will have the reverse gradient of the leaves. (I made a tri-colored gradient. Super cool, I never made my own gradient previously!
ReplyDeleteI'm glad you figured it out and posted your solution; perhaps it will help someone else.
ReplyDelete