Showing posts with label directions. Show all posts

Tuesday, February 5, 2013

Vacation In A Can

a carton of 3 round metal containers with clear lids


I've admired these magnetic metal spice containers at Ikea but have been stumped for a use.

round beach image with vintage style text


I made a fake vintage postcard using two of my photos. The tins allow for an image 3.5 inches in diameter. We collect sand everywhere we travel so I had some available to insert in the tin.

The depth was a bit more than I wanted so I put 2 layers of corrugated cardboard behind the printed image.

round tin with hawaian image and sand displayed inside


The photo came out very blue because every time I got near a light source the plastic lid had reflected images. My inner 12 year old goes Blue Hawaii and giggles. The tin insert actually looks like the image above but with sand.

Monday, February 4, 2013

How To Make Mini Saddle Stitched Notebooks Made From Comic Books

paper cutter, stapler, comic books, ruler, paper, staple remover


Somehow my kids keep ending up with free comic books which they don't read.   I wanted to do something with them other than the recycling bin so I started making mini notebooks that I enclose with my Stray Squirrels Etsy items.

Remove the staples from your comic book.

Tear the double pages into single pages and choose the best looking side to be the front side of the cover.

I made these booklets with 3 sheets of white paper which makes a 6 page booklet.
 
stapler with tape mark guide


Determine how wide your cover will be and put a tape mark on the stapler so you know how far in to staple. My finished booklets are 3 1/8" x 5". Each page will make two booklets so you need to do 2 sets of staples. I just eyeball it but you can measure if you prefer the spacing to be exact.

comic book page stapled to paper


The cover now has 4 staples. The paper I happen to be using is tabloid size but regular copy paper works better.

back side of stapled pages


I use a bone folder to press down the staples if they aren't laying nicely. This is an excellent stapler so it isn't an issue, but some of my other staplers don't work as well.

comic book page folded along staples


Fold the spine along the staple line using your hands. Use the bone folder to make a crisper fold along the spine.

book being trimmed on paper cutter


Cut the long edge of the booklet. Again, mine is 3 1/8 inches wide. Turn the book so the spine is along the top edge of the cutter and trim one end. Trim the other end so the booklet is 10 inches long. Cut the booklet in half so you have two, 5 inch long pieces.

book with ruler showing width

book with ruler showing height

completed notebook

inside of completed book

front and back of completed book

white dog


Buffy hopped up on the table to supervise and became a little jealous when she wasn't in the photos.

Monday, January 28, 2013

Beach Themed Love Note Treasure Hunt


12 sand dollars


I normally do riddle laden scavenger hunts for Birthdays but this time I did something a little different.

I took a sand dollar image, duplicated it and printed it on heavy paper with messages about what makes him special. I did one message for each year.


sand dollar messages in a bowl of sand


I put a little sand from one of our trips in the bottom of a container and then layered the messages and sand until the container was filled.

blue bowl of sand. heart drawn in sand


He then had to dig through the sand with his fingers to find the messages.

Tuesday, January 22, 2013

Chasing Buses Double Crochet Filet Stitch Scarf Pattern

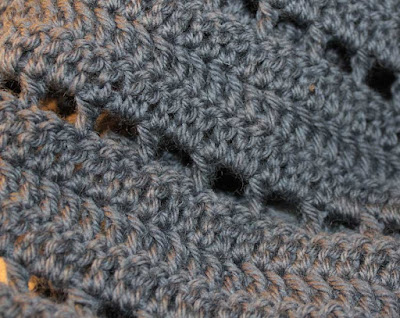
grey crocheted scarf


Alethea had scarf envy and handed me a small ball of wool yarn. I knew I needed an airy design to compensate for limited resources but she also wanted a warm scarf.

I called the pattern Chasing Buses since my other daughter just started taking classes at the U of M and she had multiple bus adventures today. The solid parts represent the streets and the holes are her footsteps in the snow as she ran.

The first row is the filet stitch followed by 3 rows of double crochet.

Here is the pattern.

Use the crochet hook size recommended by the weight of your yarn. This scarf was done using a G hook.

I chained on 30 stitches since the scarf is worked in a repeating pattern of three and I prefer odd numbers.

Insert your hook in the 6th chain from the hook and DC, chain 2, DC in the 3rd chain  from the last stitch. Repeat DC, chain 2, DC until you reach the end of the chain. Chain 3 and turn. (You now have a row of 9 filet stitches)

The chain 3 is your first stitch.
2 DC in the chain 2 space. DC in the top of the previous filet double crochet stitch. Continue across the first row. Chain 3 and turn. You will have 28 DC stitches.

DC across the top of the second row. When you get to the end, chain 3 and turn.

DC across. You now have 3 rows of solid DC.  When you get to the end, chain 5 and turn.

The chain 5 is one side and the top of your first filet stitch. Double crochet in the 3rd stitch over. Chain 2. Repeat DC, Chain 2, DC until you reach the end. Chain 3 and turn.

Do 3 more rows of DC followed by a filet row. Continue pattern until you achieve the desired length. I would have added fringe to the ends but ran out of yarn.


Monday, January 21, 2013

Macchiato Colored Crocheted Scarf

woman with face covered by crocheted scarf

I still had a lot of yarn left so I made a scarf using the pattern by Catherine South.

The scarf and the two hats used a total of 3 large skeins of yarn.

Nissa likes texture and the stitch has a fun little crossover bump every few stitches.

Friday, January 18, 2013

Ribbed Crochet Winter Stocking Hat

woman wearing crocheted hat
I had a lot of brown yarn left over so I tried another hat pattern, this one is from Crochet Geek. It's very warm and was much easier to fit.

Nissa was beginning to get a little concerned when I kept calling her to try it on since the yesterday's hat was too large and first trial fitting for this one was too tight.

I made this one 5 stitches longer than the pattern called for since she's going to be taking the bus to the U of M and I wanted to make sure the cuffed portion covered her ears.

Wednesday, January 16, 2013

Forest Tree Face Sculpted From Clay

wood bark sculpted face in clay
This face was so huge it took almost a month to dry.

I formed it over a plastic covered bowl so it wouldn't be too solid. The bark features were made by adding clay and forming ruts with my fingers.

The leaves were individually made, scored, and placed with slip.

The hardest part was transporting it, freshly made, home from the cabin in a car filled with dogs. I never thought it would survive but it somehow made the trip intact, didn't break in the kiln, and avoided being nabbed by the art thieves that plagued Nissa's class. We lost a surprising number of items.


wood bark sculpted face in clay glazed

Tuesday, January 15, 2013

Slice Carved Pottery Bowl


carved clay bowl
The wheel thrown bowl was generously sliced with a scooping motion using the loop tool.
carved clay bowl glazedcarved clay bowl glazed

Monday, January 14, 2013

Bowl Carved With A Zig Zag Cake Decorating Tool

carved pottery bowl unfired
You take the zig zag surface tool from Wilton's cake decorating line and heavily incise the surface. You need to do this before it's leather hard but not too soft or you'll cave in the sides.
carved pottery bowl glazed

Friday, January 4, 2013

Loch Ness Monster Plate

clay loch ness monster on a plate
I attached Nessie to the plate and used a metal brush to brush on a rough wave pattern.

Thursday, January 3, 2013

Wavy Textured Pottery Bowl

wavy edged carved clay bowl


I had a mishap while this bowl was drying. I went to move it and broke a chunk out of the top. I almost tossed but sometimes accidents make things better.

I cut the top edge in a random wavy pattern and used a wire brush to texture the outside of the bowl. The bowl looks better after the mishap than it did before.

Wednesday, January 2, 2013

Assorted Carved Pottery Plates

carved and glazed pottery plate


The pattern was done with the tip of a church key. The piece has to be soft leather hard, if it's too dry the tool doesn't press in smoothly.

carved and glazed pottery plate


carved and glazed pottery covered pot


These were both done with the curved side of a flexible metal tool.

carved and glazed pottery plate


The same metal tool was used here but the cut was deeper and closer together.

carved and glazed pottery plate


The tip of the loop tool was pressed in lightly, then deeper, then lightly.

carved and glazed pottery plate


I used a small melon baller to scoop out the clay.

carved and glazed pottery plate
carved and glazed pottery bowl


This surface resembles an orange. The surface was leather hard and I gently cut out small random bits with the smallest part of the loop tool.

Tuesday, January 1, 2013

Carved Pottery Hand Shaped Soap Dish

carved pottery hand shaped plate
I took a thrown pottery plate and free hand cut out a hand shape.  I put in palm creases but some of the lines filled in after glazing.

I planed on it being a soap dish but it shrank to the point where it would hold guest soaps, now it holds rings.

Monday, December 31, 2012

Bark Carved Pottery Pot

wheel thrown pottery drying on a table


I have a few pots drying before the first fire. Many of these have carving, some are plain.

carved pottery container


I used a veining tool from a wood carving set to incise this pattern which reminds me of tree bark. You could probably do something similar with the tip of a vegetable peeler.

Friday, December 28, 2012

Carved Pottery Bowl With Stone Like Pattern

wet carved pottery bowl


This pot was was so thick I wanted it to resemble a boulder, so using the loop tool, I randomly cut chunks off. 

I enjoy the smooth interior with the hewn exterior. It's pleasant to touch.

glazed carved pottery bowl

Thursday, December 27, 2012

Deeply Carved Pottery Bowl

carved pottery bowl


This pot was very chunky so I took the loop tool and carved into very deeply. The edges were a bit too sharp so I used the loop tool to smooth it a bit after it was drier but not totally dry.

glazed carved pottery bowl

Wednesday, December 26, 2012

Carved Clay Rose Petal Plate

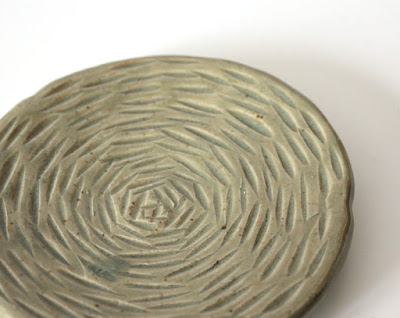
carved pottery plate


This design was so much fun to do.  I started in the center, bent the flexible metal tool, and gently flicked out chunks of clay.  I think the pattern resembles an open rose. I used kiln space at my daughter's school so my glaze choices were limited, I basically did everything in blue or celedon.

glazed carved pottery plate

Wednesday, December 12, 2012

Get A Life Mario Power Up Mushroom 8 Bit Gamer Poster

mario game illustration poster with text


I went old school while watching 12-12-12: The Concert For Sandy Relief on Hulu.

It's been awhile since I played the old games so it was a good thing my kids let me know which color mushroom to use.

The 8 bit look can be done pretty easily in Illustrator.
* You make a frame using the rectangle tool.
* object->path->split into grid
* choose the number of rows and columns and make the gutter 0.
* click on a square with the selection tool (black arrow) and fill it with color. If you hold down the shift key as you select the squares, you can color multiple squares at one time.
* You are left with faint lines after you remove the lines by making them transparent so I go to window->pathfinder->unite and combine the shapes as I color them them.

Available on Etsy

Wednesday, October 31, 2012

Easy DIY Lacy Style Fancy Mask

young woman wearing black lacy mask
I saw this pattern from Sprinkles in Springs and was struck by it's elegance and simplicity. I must admit I would never have thought of using Puff Paint for anything, much less a mask.

It peeled off the saran wrap beautifully and I used Tacky glue to attached a satin ribbon on the back of the edge.

We found sheer, flesh color fabric so it looks like it's floating on my daughter's face and the ribbon matches her hair color.

I would suggest checking the eye holes before making it since heads come in all sizes but we didn't have to adjust it for Nissa.
how to make the mask